Wednesday, May 29, 2013

Chicks with Momma Hens

By now you must have figured it out - I am a child at heart.  It's the simple things in life that bring a smile to my face and yesterday was a great example.

We've had three broody hens locked in a separate pen sitting on eggs.  I honestly didn't expect much because "everyone" says:  They have bred the broodiness right out of the hatchery hens.  Well - it seems that is not the case.  My son and I have been pecked and squawked at so much this spring that we decided to find the three worst offenders and see if they were serious about sitting.  THEY WERE!

I don't know why this amazes me so much but I am.  We've been checking every day and yesterday there they were.  Two momma's and 5 chicks down on the floor and one more momma still sitting in the nesting box on top of at least 6 more chicks.


The instinct to nurture is still there and considering that the momma hens were raised in a hatchery incubator and have never been "sat on" or taught how to be momma's...well - I just love it!  The chicks are every colour of the chicken rainbow!  Black, yellow and beige - it quite a mix. 

BIWAF - Before I Was A Farmer  I had no idea about how this all worked so let me explain in Magic School Bus language.  Chickens lay an egg an average of 5 or 6 times a week - basically once a day in the early spring/summer and a little less in the late fall/winter.  It has nothing to do with it being cold and everything to do with the hours of daylight available to the hens.  That's why traditionally there was a glut of eggs in the spring and summer and much less in the fall and winter.  The number of eggs can be manipulated by adding lights to the coops to extend the "daylight" and confuse the hens.  It's a long and troublesome conversation to have with chicken owners - some believe the hens should have a rest and therefore no additional lighting.  Some seeing the financial/practical side and leave the lights on because consumers have lost touch with the cycles of life and don't really understand when suddenly there are no eggs to sell them in December.

Chickens may be tricked into laying eggs all winter but somehow they know when it's spring-for-real because they get broody.  Broody - means a generally quiet and contented hen turns into the Terminator and will peck your hands to the point of drawing blood.  They are really great little protectors!  Those meanies are the ones who want to be momma's!

We have a coop of 60-70 chickens with several breeds represented.  We have about 14 nesting boxes for them to share but sharing to chickens is all about seeing how many of them can cram into one 12x12 box at the same time and still be able to lay an egg.  I've found as many as 4 in one box - with many empty boxes available.  Of course there are always some hens that cross their legs and wait till you let them out and no-joke - they come tearing out the door to find their favourite hidey-hole no matter how long you keep them cooped up!

Our egg-layer pen is actually two pens with a little mini-door connecting them.  Most of the year the mini-door is open so they can go back and forth between them but coming sittin' time we allow for one day of egg laying in the nests and then lock the broody hens in and everyone else out.  That means that in our situation the hens are actually sitting on everyone else's eggs - thus the colourful offspring!

The really interesting part is when you have a hen that sits on her own eggs.  She will faithfully lay an egg a day in a nest in some out of the way place in the barn (that usually ends in disaster when  a raccoon finds the nest).  Day one - one egg.  Day two - one egg and so on until she has what she considers enough - usually 10-15 eggs.  The day arrives and she decides - today I will sit.  She will barely leave the nest to eat and drink and 21 days later the little cuties will be peeking out from under momma.  Stop and think about that for a minute.  They all hatch the same day.  That means the egg she laid on day one has been sitting there for 2 weeks before she sat on it and then another 21 day afterwards. Isn't that something!!


Our 50 hatchery chicks who are now a week and a half old were out growing their brooder box so we decided to put them in the pen with the momma's and the babies and see what happened.  We added just one at first to make sure the momma's wouldn't go psycho and kill it.  She just sniffed it and under it's wings it went.  I'm sure she must have thought - MY - WHAT A BIG CHICKIE YOU ARE!!!  All went well but when we added the other 49 chicks the momma's weren't fooled so easily.  They have become two camps in the same pen but seem to be co-existing quite well.

Chicks are so much fun...so let's do the math: 70 layers plus 50 meatie bird chicks plus at least 10 16 new chicks= lots of chickens... and next week the ducklings hatch!  Oh my!

Tuesday, May 28, 2013

Masked Bandits at the Farm

Don't worry - all is well and we have caught the thieves   We've been dealing with nightly raids for weeks - they were certainly getting the best of us.  We thought it best to keep the authorities out of it given the circumstances.  However the theft and damage was becoming very costly.  In true Mission Impossible fashion we conducted surveillance, decided on the best course of action and thankfully everything turned out OK and no one got hurt.  

We did however catch some really cute raccoons.

The little buggers were in the walls of the barn for weeks and found a way to make daily forays into the duck pen - which we thought was as fortified as Fort Knox -  where they ate themselves silly on duck food.  How convenient - we put out food for them just like the dog.


We put the trap right in the pen on Saturday night and by Sunday morning we had number 1.  We delivered her to the local conservation area and reset the trap.  This morning we caught Number 2 sneaking around in the pen so into a cage he/she went.  After waiting for several hours in hopes of catching some more siblings (and hopefully saving us a trip) we gave up and made the second trip to the conservation area. We arrived home and thought - let's go check the pen right away - and there were Numbers 3,4 & 5 pestering Momma Duck who was kicking up a really loud fuss about them invading her space.  Back to the conservation area we went AGAIN!  I was feeling rather like we needed to name our unorthodox animal taxi service.  The Masked Bandit Express?  


They are adorable-looking but we have seen first hand the damage they can do in the barn and how much they EAT!  Bye-bye raccoons...problem is I heard at least one more!  The trap is set - we'll see what we catch tomorrow!


Friday, May 24, 2013

Information about Botulism


I was having a conversation today with someone I love dearly.  The topic of canning came around as it usually does when standing in my kitchen filled with canning gadgets and tools at this time of year.  She proceeded to tell me about the carrots she had water-bath canned two years ago and how she did it as an experiment and was going to test taste them soon.  Sigh.  I know many older people who have canned for years are not up on all the latest canning information and some people who have just started canning who need to know this information -  PLEASE - do not can low acid foods in a water-bath canner.  Canning is incredibly safe if you do it right and incredibly dangerous if you do it wrong!  It's not hard to figure out you just need to know the basics of canning.  

Health Link BC did a great job on the article and said it better than I could.  Please read and take heed!


What is botulism and how is it caused?

Botulism is a serious form of food poisoning that can cause death. The poison is produced by Clostridium botulinum, a bacterium that is commonly found in soil, or on raw fruits and vegetables, on meat and fish and many others foods and surfaces.

Botulism spores are tough, and cannot be killed with boiling water or heat without including canning pressures.

Botulism bacteria (the bacteria that grow out of germinated spores) can multiply quickly in a moist, oxygen-free environment and create a very powerful poison. One teaspoonful is enough to kill 100,000 people.

Improper home canning creates the perfect environment to grow botulism.  Because food contaminated by botulism may look and smell normal, you cannot tell by looking at the food whether it is poisoned by botulism bacteria.

What steps can I take to avoid botulism?

Home can properly using extreme care to avoid botulism. Do not take any short cuts.

High-acid foods are resistant to bacteria and only need the "boiling water bath" method of canning. Plums or rhubarb are high acid foods. The "boiling water bath" is a food preservation method commonly used in making jams. It involves dropping a basket of sealed jars into a large pot of rapidly boiling water. 

Low-acid foods such as most vegetables, meats and seafood must be canned at a higher temperature using a pressure canner.

What do I need to know about pressure canning?

A pressure canner is a large, cast-aluminium pot with a locking lid and a pressure gauge. By cooking under pressure, you can bring the temperature of boiling water up to 116°C (240°F). This is the minimum temperature necessary to destroy botulism spores, and the only way to guarantee safe canning for food items such as vegetables, meats and seafood.

Your pressure canner should come with complete instructions. Always follow them carefully. 

Keep these points in mind:
  • Foods can be processed at 5, 10 and 15 pounds pressure. Consult a chart provided in the instructions to determine what pressure is safe for the food you are canning.
  • Processing time will vary depending on the type of food being preserved and the size of the jar. Never shorten the cooking time that is recommended in the instructions.
  • If you live more than 1,000 feet above sea level, the pressure and cooking time will have to be adjusted. Consult a chart.
  • Once the right pressure level is reached during cooking, it must be kept constant throughout the cooking step.
  • Both weighted gauges and dial gauges should be checked for accuracy. Read the manufacturer's directions carefully for recommended testing and frequency procedures, to make sure your canner is being operated safely and correctly.
What jars are best for canning?

It is important that you use heavy-duty jars made specifically for home canning.
"Mason" type jars - which screw shut with a threaded neck - are the most common choice. Do not re-use the lids: after a lid has been pried off once, a perfect fit can no longer be guaranteed. The jars themselves can be used many times, as long as the rims are perfectly smooth and there are no scratches or cracks that would prevent a perfect seal.

It is important that you do not use commercial jars, such as empty peanut butter jars for home canning. Commercial jars are not strong enough to be safely used.

What should you do if the home-canned food does not seem right?

Never eat, or even taste any home-canned food that:
  • Appears to be spoiled;
  • Foams;
  • Develops a bad smell during cooking;
  • Has a bulging container lid or is leaching;
  • You are not sure if the food was properly canned or not.
Place any questionable containers and food in a waterproof container and throw it in the garbage. Do not feed the questionable food to your pets or any other animals. After throwing it away, wash your hands well with warm soapy water. Also wash any utensils or surfaces the food, container, or your hands may have touched.

The importance of cleanliness

All work surfaces and your hands should be kept clean during all stages of the canning process. The food being preserved must be rinsed clean. It is very important to sterilize the jars and seals before use. To sterilize jars, boil them for 10 minutes. If you live at higher elevations (over 1,000 feet), allow 1 extra minute of boiling for each extra 1,000 feet of elevation. To sterilize tops, follow the manufacturer's instructions. Wash your hands often with warm soapy water.

For more information

Home canning is perfectly safe but needs to be done correctly. It is a good idea to read about home canning before you try it. Books are available on the subject, either at the library or in the stores. Pressure canners almost always come with instructions. If you have an older pressure canner and cannot find the instructions, contact the manufacturer for a copy.

An excellent source of information on home canning is the Utah State Canning Guide at extension.usu.edu/utah/htm/fcs/food-preservation-canning/usda_home_canning and at EatRight Ontario – Home Canning www.eatrightontario.ca/en/Articles/Cooking-Food-Preparation/Home-Canning.aspx


Thursday, May 23, 2013

Lilac Jelly

I heard about Lilac Jelly from a friend and was just as astonished as anyone else - you can EAT lilacs?????  I'd never heard of that before and couldn't wait to try it myself.  You can read her lilac post here: Farmgal's Blog  Lilac bushes are one of the only bushes we don't have on our farm but no worries the side roads are covered with them! Lilacs come in white and many shades of purple.  The most common is a light purple and as I was working with them I realised that they were not all the same either. What I REALLY wanted were the deep dark purple but I couldn't find any on the roads nearby.  I'll have to do some scouting for next year.

DH and I had an appointment in town and on the way back we picked one "green box" of heads with some leaves.  It was probably half leaves and stems by the time I was done.


When I got home I stripped the flowers off the stems.  I started by picking them off - that took WAAAAY too long so I just ran my fingers along the main stem and stripped them instead.  You want to avoid the green bits as much as possible but don't worry if some get in there.


I used 1.5L jars and packed them almost full - tamping them down several times as I worked.  I ended up with three jars full.  I did NOT rinse them first as I made sure to pick the flowers on the opposite side of the bush from the road when possible.  Once filled I poured a kettle of boiling water over them.  You can see the progression in the jars as I waited for the next kettle to boil.  I left them overnight and by morning there was no colour left in the petals and lots of lovely purple "juice" in the jars.

Since I had so much juice to work with I decided to experiment a little with the sweeteners.

Batch 1: 

  • 8 cups of lilac water
  • 1 cup honey
  • 2 packages No Sugar Needed Pectin by Bernardin

Batch 2:
  • 4 cups of lilac water
  • 2 cups sugar
  • 1 package No Sugar Needed Pectin by Bernardin

Batch 3:
  • 6 cups of lilac water
  • 2 cups apple juice
  • 1/2 cup lemon juice
  • 3 cups sugar 
  • 1 box Pomona's Universal Pectin


The No Sugar Needed Pectin is becoming more available in regular stores like Canadian Tire and Home Hardware.  I hope I am able to find more of it because it does allow for more experimenting than regular pectin.  It is used exactly like the regular or low sugar pectin most people are familiar with.  I found Pomona's in a health food store after searching for years.  It is available on line but I didn't really want to pay shipping.  Both worked equally well to gel the jelly.  Pomona's is made from a citrus extract and uses calcium to activate the pectin - it comes in the box along with instructions which were easy to follow.  A box of Pomona's will set two recipes so the price works out about the same.

So the results:

Batch One tastes terrible!  I was very disappointed.  The combination of honey and the floral flavour was not a match made in heaven!  

Batch Two: was much better.  The lilac flavour was MUCH stronger than I anticipated and DS said no thanks.

Batch Three was the best of all of them.  I'm not sure of Pomona's has anything to do with the taste but the quality of the gel was much nicer.  That could also be the extra sugar I used.  The flavour was intense but not overwhelming.  I know you want to know how it tastes and the best I can do is: like a lilac should taste - like flowers. ha ha!  Next time I am going to try half lilac water and half apple juice.

My friend suggested this over lemon cake or on a very light tasting bread - it would not go well with heavy-duty rye bread.  She also suggested using it as a glaze for meatballs... I'll let you know.

For the how-to part just follow the instructions for grape jelly on the pectin packages.  I water bath canned for 10 minutes.

The only sad part was when I water bath canned it I lost all the colour.  I'm not sure why.  Here's a before and after picture.


The lilacs are still blooming - if you try it let me know!!

Saturday, May 18, 2013

Full house in the barn and Sheep Shearing

We're running out of room!  I am trying to juggle animals in the available cages and pens and I'm not sure exactly how this is going to work out.  

Fifty-two White Rock chicks arrived this week - one died within hours of getting here - poor little guy.  White Rocks are meatie birds...and every year I say I'm going to go with another breed but I don't - so here's to hoping that most of them make it to the butcher this year.  Right now they are in our home-made brooder.  DH and DS overbuilt a brooder box for me a few years ago.  It's as heavy as a box full of cast iron frying pans and looks like a coffin-for-two!  Thankfully it's so well built it doesn't need to be INSIDE another pen.  The problem is it will only last for a week and they will need bigger quarters.


I also have three very faithful hens sitting on eggs.  These are the Red Sex Links that everyone says have the broodiness bred right out of them.  I'm not so sure.  I've had to fight a lot of the hens for eggs in the past two weeks so something is kicking in.  We've never allowed any hens sit before so it will be interesting to see how successful they are.  We have about 70 hens and only one rooster - let's hope he was a busy guy! 

We also have 4 ducks sitting on eggs.  One white Muscovy, 2 black Muscovies and Pom Pom Head our Crested White.  These have all been good momma's in the past - we've just had some setbacks in their nesting boxes and had one family massacre by an angry papa duck.   We just let the ducks nest in their pens last year and those girls sat and sat and sat.  It should only be 4 weeks but I gave them a few extra thinking maybe my numbers were off.  Nothing hatched.  When I explained the situation to a farming friend she asked what they were nesting on.  Apparently a concrete floor with some shavings wasn't optimal because the concrete would wick up any moisture which is necessary for the eggs to hatch.  This year we got creative!  I had some leftover over stacking storage bins

 and used shavings on the bottom and a nice layer of leftover sheep wool that was headed for the compost pile.  Hopefully that provided them with a toasted warm place but we'll wait and see what kind of hatch I get before I get too excited.  P.S.  I didn't stack them but I did place large sheets of wood on an angle against the wall to provide them with some privacy.

In order to prevent another massacre by the papa ducks we need to put the fathers somewhere else as soon as the ducklings are hatched.  The twist is the boys don't get along with each other either so they can't be in the same pen.  They tend to work out their differences ok outside where they pester each other all day long - chasing, honking and beating on each other but in a small pen that behaviour could result in death.  I may need a spreadsheet to figure it out!  Springtime hormones oh MY!

Yesterday - we finally got the sheep sheared.  We had arranged to have it done earlier this week but the animals had been out in the rain and wet sheep are next to impossible to shear.  We kept them indoors for a few days to dry up and all was well.  

Mr. Sheepie looks ridiculous.  I guess all sheep look funny after being shorn but you wouldn't recognize this guy.  He's so tiny.  We've never seen him shorn before - there was more wool on him than flesh.  He looks a lot like a goat - a very tiny skinny goat.


The shearer was going to leave the wool but since I doubt I will have to time to learn how to spin this year I gave her most of it and just kept Mr. Sheepie's.  His was so matted it would probably have been rejected by the wool co-op anyway.  I'm sure there is enough for me to play with as it is.  The colour of his fleece is particularly gorgeous...next year it will be better as he skipped a year getting sheared!


Rebecca Parker - Sheep Shearer - Bethany Ontario middlekingdomfarm@gmail.com or  905 259 1102.

You may have read that my daughter and I took on shearing the sheep last year.  We only needed to do two and it was an adventure that I'm not sure I want to repeat any time soon.  Rebecca was great and we learned a lot of shearing tricks - maybe we'll try the calmest one and let her do the rest next year!


Thursday, May 16, 2013

Monkey Butter Canning Recipe

It has come to my attention that this recipe is not safe for long term canning.  Make it and keep it in the fridge - it's yummy but canning banana's is not a good idea.  My apologies.

I was in the mood to do some canning this week and I've read about this recipe several times.  You have to admit the title sounds pretty intriguing already - Monkey Butter.  What is that anyway???

It's a totally yummy tropical tasting jam...made with pineapple, bananas and coconut (and sugar) it is not  very 100-mile-diet.  I know I know!!!  I adore all three ingredients - oh what to do!!

One of my Methods-For-Success is to make a recipe the way it was written first and THEN make adjustments.  So in went ALL the sugar called for - it was really hard to do!  


Anyway - on to the original recipe for MONKEY BUTTER.

5 ripe bananas (but no brown spots on the inside)
1 - 20oz can of pineapple with the juice
1/4 cup of shredded coconut
3 cups of sugar
3 Tbsp. of lemon juice

OK - I almost followed the recipe exactly!  First thing I did was double the recipe.  The canned pineapple didn't have ounces on it so after some time with google I decided three small cans equally approx. 42 ounces.

Slice the bananas into a large pot, add the rest of the ingredients and set the stove to a medium heat to heat it up and then turned it down to low - don't leave the stove - that much sugar will burn if left unattended for too long.  I wanted a jam that spread without huge chunks so I used an hand-held immersion blender to blend it down.

The Monkey Butter simmered for about an hour on very low as I washed my jars and set them in the canner to sterilize them.  We have hard water so I added a little vinegar to the canner to prevent cloudy-looking jars.  Simmer the flat lids in another small pan to soften the seals and prepare your counter so you have enough space to work.

When the Monkey Butter has reduced to a nice thick jam it's ready to can.  Remove the jars with  canning tongs (but don't empty the water out of the pot) and fill them using a funnel to within 1/2 inch of the rim.  Top with seal and a ring and water bath can for 15 minutes.  That means place the filled jars in a large pot/water bath canner with a lid with enough water to cover the jars by an inch or more and bring to a rolling boil.  Start timing the 15 minutes when the boiling starts.  

Remove jars and place on a cookie rack covered with a tea towel and cover the jars with another tea towel and do not disturb until completely cool - which is usually the next day.  Check to make sure each jar sealed by pressing on the tops - there should be no wiggle.  If there is a wiggle just put it in the fridge and eat it right away. 

Remove the rings from the jars and use warm running water and a clean dishcloth to wash each jar thoroughly so there is no jam on the outside to mould after a few months or years on the shelf.  By washing the jars this way you'll know-that-you-know that the lid is on tight and sealed.  Don't forget to label the jars - I use a permanent marker on the lid because I hate scraping off stickers later.  Without a label these will look like apple sauce in a few weeks!  I was able to make 10 - 1/2 pint jars from this recipe


So for what I could adjust... I had lots of ideas.

First off honey instead of sugar - maybe 1 cup honey for 3 cups sugar - it would probably require a longer simmer.  Or part honey and part sugar. 

I could make pineapple out of zucchini - yes really you can.  It's basically chopped zucchini, lemon juice, pineapple juice and sugar - a weird but wonderfully inventive idea from back in the days when pineapple was unheard of for most people due to the expense and the lack of transportation made it unavailable anyway.

There is no substitute for bananas in my world.  I love banana's.  We buy them three bunches at a time and always run out. The coconut - hmmmm - dried shredded apples maybe?? 

You can spread it on toast - I think it would be great with peanut butter! It would be delicious on ice cream or yogurt.

Regardless of the 1000 mile recipe or maybe because of it - it tastes like a million dollars!

Friday, May 10, 2013

Dandelions - free e-book


I found this great FREE e-book about dandelions with many ways to get the benefits of dandelions.  There are recipes for vinegars, tinctures, infused oils, salves, honey, soaps and salads. Since I am surrounded by acres of dandelions - many of which decorate my lawn - I was very interested and will be trying out some of the recipes soon.  If you live nearby and need a source of un-sprayed organic yellow "weeds" come and get 'em.


Thursday, May 9, 2013

4 Acres and Independence

I love how creatively this man uses his property.  Tons of good ideas and just an enjoyable video to watch for fun.  


What do you think?  Any ideas you would want to try??


Sunday, May 5, 2013

Springtime photos


Our zig-zag fence - I love how it looks but it's not the best for keeping baby lambs where they belong.


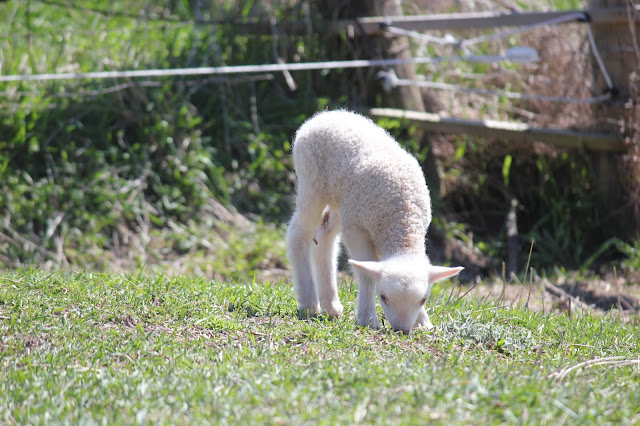
This would be one of those baby lambs!  She's so small she fits through the regular page wire fence holes.


When the babies get separated from their momma's for even a few seconds it starts off another baaaaaa-fest until everyone knows where everyone is - then back to peaceful grazing. 


I'm sure she must be thinking - are you done taking pictures yet??


A pile of kittens - 4 to be exact!


The Duck Boss


...and one of the Duck Boss's wives.


Levi the guard dog whose favourite toy's are rocks and sticks and his basketball which he uses to play soccer by himself.

Saturday, May 4, 2013

A blogging milestone

Photo Credit - lilduckduck
When I was in high school my English teacher despaired of teaching me follow the rules.  All those subject and predicate lessons - snore snore.  The hours spent sitting in a classroom going over  why you should not write run-on sentences, how CAPITAL LETTERS  only belonged in certain places and what those special characters were for - you know the ones like (:) or (;) or (-).  I specifically remember him telling me that I wasn't supposed to use (-)'s as much as I did and that "a lot" was not spelled "alot" - I remembered that one!

I admit that passing my Grade 12 English class was one of the first miracles ever recorded in my life.  Oh how I hated English class and was glad to be done with it.  The teacher wasn't a bad guy - I kind of liked him but we just didn't see eye-to-eye on HOW to write.

I've always had LOVED writing - MY way.  That's the great thing about being an adult - I get to do it MY way.  Years ago I picked up a magazine called Harrowsmith.  It is no longer being published but it was a great Canadian magazine about country living, gardening and small scale farming/self sufficiency.  The articles were fabulous but my favourite part was the letter from the editor that began each issue. He wrote like ME!  He used CAPITALS and underlining.  His sentences ran way too long (by English teachers standards) and reading it was a wonderfully crazy ride through his thought process.  Ah ha!  If he could write for other people to read - so could I.

I always thought that 'someday" I would write a book.  That was before the internet had it's impact on my life and long before blogging was even a word.  I did wonder if ANYONE would actually want to read what I wrote.  I was quite sure My English teacher would not!

Yesterday I passed 50 000 visits to my blog.  I'm not sure how accurate it is or if half the visits are internet bots (or if there's just a few of you who have re-read 50 posts - 100 times each) but I thought 50 000 was worth a mention.

Thanks so much for reading and allowing me to do something I LOVE while having instant feedback.  Blogging is so much more satisfying than writing a book!  (well - who knows!)

I so appreciate every one of you!  I love it that you are reading this blog all over the world and that you allow me a peek inside your lives by sending me comments and emails.  Thanks for letting me share my stories MY way!

hugs!
Anita


Thursday, May 2, 2013

A difficult day on the farm

If you don't like sad stories then you probably don't want to read any further but this is part of life on the farm and the "making of a farmer" as well. I've been procrastinating for a whole week trying to finish this post but apparently I needed to do some soul searching first.

The tale begins with the weather which was exceptionally nice last week.  My son and I were cleaning up fallen branches from the previous weeks ice storm and checking trees for damage.  Once that was done - we were on a roll.  We decided since we had all the tools out that we could cut down some shrubs so we can widen the driveway.  No problem - they came down without too much trouble but that's when the real trouble began.  

I thought - HEY free food for the sheep and donkey.  They are looking hard for green food at this time of the year.  I threw a branch over the fence to judge their reaction and they didn't seem overly interested but munched somewhat on one of the branches.  I had a niggling feeling...so I pulled the branch out thinking it would probably be wise to check it out on google before I gave them any more.  We got busy cleaning up and I forgot to check. 

Hicks Yew
The next morning my best ewe Bonnie was dead.

I knew immediately what had happened - it was the shrub.  It's all well and good to tell yourself that "everyone makes mistakes" but that wasn't helping at that moment.  I was responsible.  I had killed her.  In my mind it became a wail - I killlllllled her.  I was heartbroken. I spent some time kicking myself and crying - ok - sobbing.  The wave of guilt was not a pretty sight.  If Bonnie had died of anything else maybe I wouldn't have felt so bad - or so responsible - or so stupid.  Ack.  

My soul searching began when I recognized that if one of the kids had made this mistake I would have been much more forgiving.  Hmmm... why was that?  I could hear the words in my mind that I would have used to comfort them and realised they were NOT the same words I was telling myself.  This was the beginning of wisdom - with more to come.

I didn't have much time for a pity party because I had to decide what to do.  I had only given token thought to this inevitable outcome in our farming career so I didn't have a concrete plan.  After checking Google-that-never-fails and sending a panicked text message to a sheep farmer friend I figured out the best course of action.  I needed to bury her.  That would have been a terrible enough task if the weather had been sunny and bright but it was cold and pouring rain.  At least it suited my mood.  Have I ever mentioned that we don't own a tractor?

I learned more than one lesson that day.  First off when you dig a hole in the pouring rain in the corner of our field you hit clay at the three foot mark. If you mix clay and rain water you end up with boots that weigh 50 pounds each and it gets really slippery really fast.  If I believed in penance I think I would have been paid up by the time I was done.

The shrub we were cutting down was a yew.  It's a very common landscaping plant in the city and as far as I know we only had one of them.  It's now been burned in the fire pit so there is no possibility of repeating this specific tragedy. Google told me that it would take only 1 ounce of yew to kill a 150 lb animal and that it was a common spring time event because animals are extra hungry for green food at that time of year. 

Yesterday a farming friend quoted a common farming maxim - "if you have livestock - you will have dead stock".  That's life on the farm.  

We are human so we make mistakes. That's where forgiveness comes in.  It would have been easy for me to forgive one of the kids - it was much harder to forgive myself.  I wondered why.  I got to thinking that maybe it was because I'm a Mom.  I've spent my life taking care of other people. I feel it's my RESPONSIBILITY to prevent bad things from happening. More than anything I work HARD to prevent problems.  I'm the one who sees the danger in swinging from the ropes in the barn - you could break your leg or fall through the floor in some spots!  I'm the one who sees the danger in using an axe as a weight to throw a rope over a tree to hang the tire swing.  I'm the one who says - be careful on the hammock to the kids when they get kind of wild - just before it breaks.  Isn't it a mothers JOB to make sure everyone in her charge - and the occasional random stranger - stays SAFE?  It's what I do and that day I felt like I'd failed in the animal momma department.

That's life - isn't it. Despite all my warnings (or maybe because of them) no one fell through the barn floor, no one got hit in the head with the axe and the injuries from the hammock incident were minimal but some days no matter how hard I try things don't go right with life or kids or animals.  Oh yeah - maybe I'm not the one really in charge.  Maybe it's not ALL my responsibility.  That's a thought.

I went to bed that night feeling somewhat better having processed some of these thoughts but I woke up with just a touch of dread.  I went out to the barn early - just make sure all was well - that's code for see-if-anyone-else-had-died.  I felt a bit sick.

God knew the exact remedy I needed because what I found was not what I was expecting.  There in a little patch of sunlight was a new baby ewe lamb.  Little Bonnie is doing well (and so is her friend Clyde who was born three days later.)  Death and life on the farm in less than 24 hours.  I didn't even know the momma's were pregnant for sure!


I'm glad I'm not in charge of everything.  I am glad that there is grace for me when I make mistakes. I am delighted to have a front row seat to the miracle of life on the farm but I'm beginning to recognise that being a steward of life means having to deal with death too.  That's a lot harder but part of becoming a farmer - because as I've often said:  Being a farmer is hard on your heart.

Without LIFE there would be no death but without DEATH there would be no life.  I choose LIFE.  I choose to engage in LIFE. To snuggle baby lambs and baby kittens, to scratch Ben the Ram under his chin, to hug Maybe the donkey, to pet Levi the dog, to hug my kids and my husband and my family and my friends and tell them I love them.  To LIVE because that's the kind of living that makes LIFE worthwhile.